Django translation tutorial
Setting user language
February 02, 2016
This post is part of a tutorial series.
In the previous post I have shown how to setup the translations on Django templates and javascript code. However, although there are several ways to configure how Django uses translations, so far we have used the settings to define an application-wide language. In this final post I will show how we can set up Django to use a user-defined language. If you have not followed the previous posts, you can download the project from this link.
Setting language by user locale
Django has a very flexible model of deciding which language should be used for translations. In this section I will show how to apply translations by the browser accepted language. Let's start by opening the settings file (languages/settings.py) and make sure English is set as default language:
# Internationalization
# https://docs.djangoproject.com/en/1.8/topics/i18n/

LANGUAGE_CODE = 'en-us'
Now, we must tell Django which languages we have available for translations. Add the LANGUAGES list to your settings file:
from django.utils.translation import ugettext_lazy as _

(...)

# Internationalization
# https://docs.djangoproject.com/en/1.8/topics/i18n/

LANGUAGES = (
    ('en-us', _('English')),
    ('pt-pt', _('Portuguese')),
)

LANGUAGE_CODE = 'en-us'
Note that we are using ugettext_lazy to translate the language names. You can read more about it here. Finally, we must add the LocaleMiddleware to our list of middleware classes:
MIDDLEWARE_CLASSES = (
    'django.contrib.sessions.middleware.SessionMiddleware',
    'django.middleware.locale.LocaleMiddleware',
    'django.middleware.common.CommonMiddleware',
    (...)
)
Run the server and Django should now be ready to return your translations. If you have made any changes to the messages don't forget to compile them.
python3 manage.py runserver
If you point your browser to http://localhost:8000/languages/ you should see the content translated into Portuguese (if it is defined as your browser's language) or English. Another way to check if this method is working fine is to use curl and the Accept-Language header:
$ curl http://localhost:8000/languages/ -H "Accept-Language: en-us"

<h1>Hello</h1>
<p>Welcome to my site.</p>
$ curl http://localhost:8000/languages/ -H "Accept-Language: pt-pt"

<h1>Olá</h1>
<p>Bem-vindo ao meu site.</p>
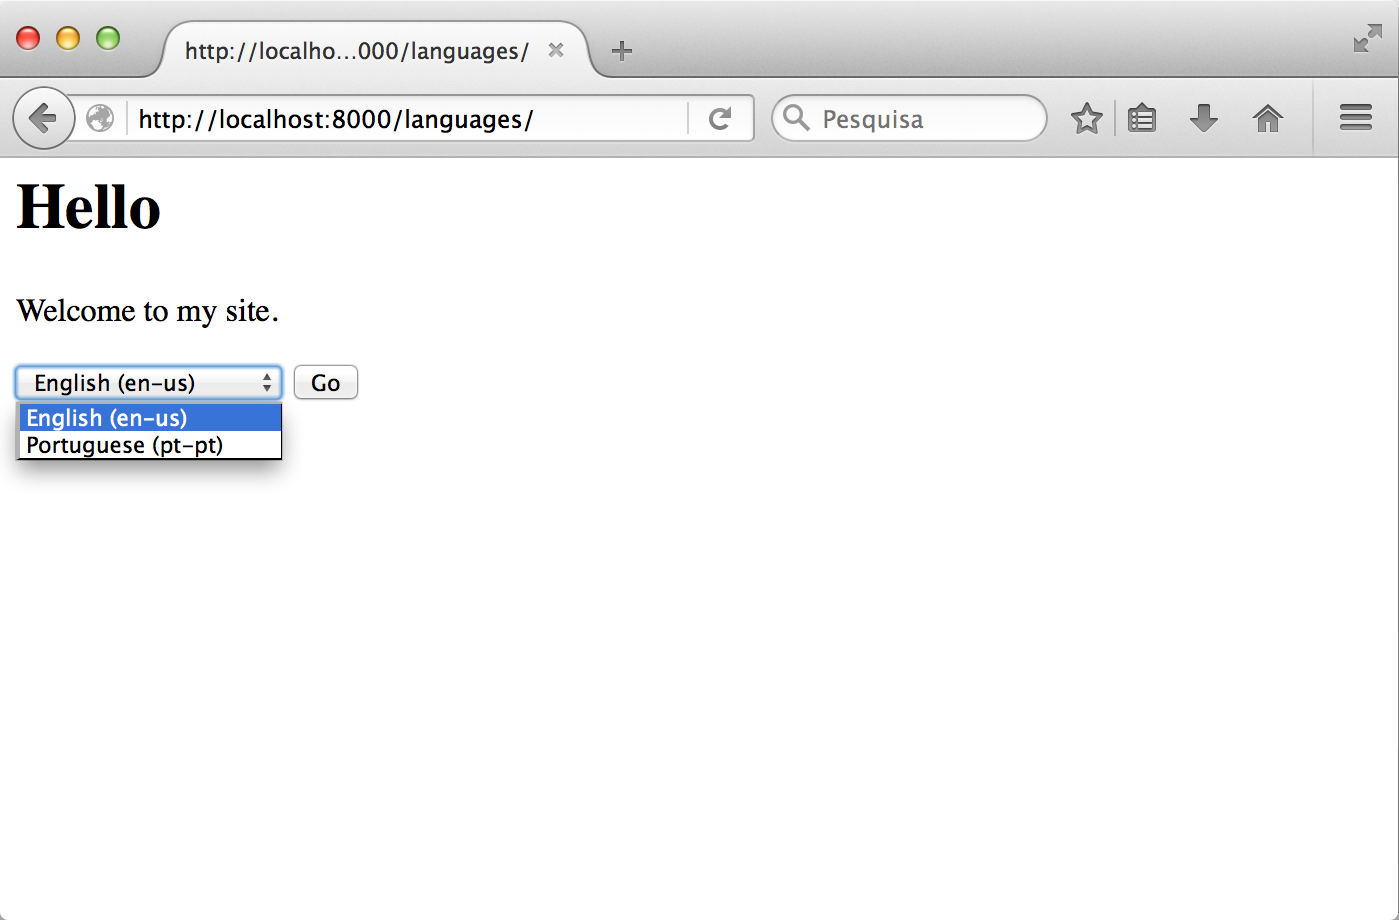
Selecting user language from list
Another way of serving translated content in Django is to allow the user to select from a list. It uses the set_language redirect view.
First, open languages/urls.py and include the set_language view:
from django.conf.urls import url, include
from . import views

urlpatterns = [
    url(r'^$', views.index, name='index'),
    url(r'^i18n/', include('django.conf.urls.i18n')),
]
Now, open the template file at templates/languages/index.html and include the form to select the language:
{% load i18n %}

<h1>{% trans 'Hello' %}</h1>
<p>{% trans 'Welcome to my site.' %}</p>

<form action="{% url 'set_language' %}" method="post">
    {% csrf_token %}
    <input name="next" type="hidden" value="{{ redirect_to }}" />
    <select name="language">
        {% get_current_language as LANGUAGE_CODE %}
        {% get_available_languages as LANGUAGES %}
        {% for lang in LANGUAGES %}
            <option value="{{ lang.0 }}" {% if lang.0 == LANGUAGE_CODE %} selected="selected"{% endif %}>
                {{ lang.1 }} ({{ lang.0 }})
            </option>
        {% endfor %}
    </select>
    <input type="submit" value="Go" />
</form>
The form shows the list of available languages and sends a POST request to the set_language view with the selected language. Finally, open the view at languages/views.py and make sure that it uses render to render the template instead of render_to_response, as the latter fails to include the csrf_token:
from django.shortcuts import render

def index(request):
    return render(request, 'languages/index.html')
Finally, since this method uses the session variable, you may have to create the database tables with python3 manage.py migrate.