Installing Mac OS X on Virtualbox 4.2
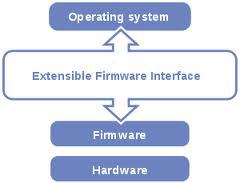
EFI Method
December 04, 2012
Yesterday I've published a post on how to install Mac OS X – Snow Leopard - in Virtualbox 4.2 using external boot loaders. Unfortunately that method causes a lot of kernel panics and is not reliable because sometimes it boots successfully, sometimes it doesn't. In this post I will show another way of installing Snow Leopard in Virtualbox, but using the EFI method. With this method your Mac OS virtual machine will be more reliable, and you will be able to do basic things from the Operating System such as reboots, shutdowns and the simple "About my Mac". The only downside so far is that it seems you won't be able to set screen resolutions outside of 640×480, 800×600, 1024×768, 1280×1024 and 1440×900.
What do you need?
-
Mac OS X – I suggest to buy an original retail DVD of Snow Leopard, but for testing, you can google for Snow Leopard retail DVD torrent. There are some modifications out there by the Hazard team, but I have had so much trouble during installations that I suggest the original (or a copy) of the retail DVD’s. I’m using a 10.6.3 ISO image.
-
iBoot – for booting up Snow Leopard on the Virtual machine, since the retail DVD iso’s are not capable of booting themselves. You can download it from here (tonymacx86 forum – you have to register). If you have a Pentium 4 or another single core processor, I think you have to download “iBoot Legacy 2.7.2″. For Core 2 Duo Intel processors you should download “iBoot 3.3.0″. If you have an Intel i3, i5 or i7 CPU, download “iBoot Ivy Bridge 1.0.0″ or latest.
-
Mac OS X 10.6.8 update combo v1.1 – if your retail DVD is not the latest version of Snow Leopard (10.6.8), download the combo file directly from Apple. It is a big file, about 1.1GB
-
Legacy 10.6.8 kernel – the same as previous, if you are updating to 10.6.8 you will need a 10.6.8 kernel. You can find it at osx86.net forum, although you will have to be registered in the forum to download it.
1. Create Virtual machine
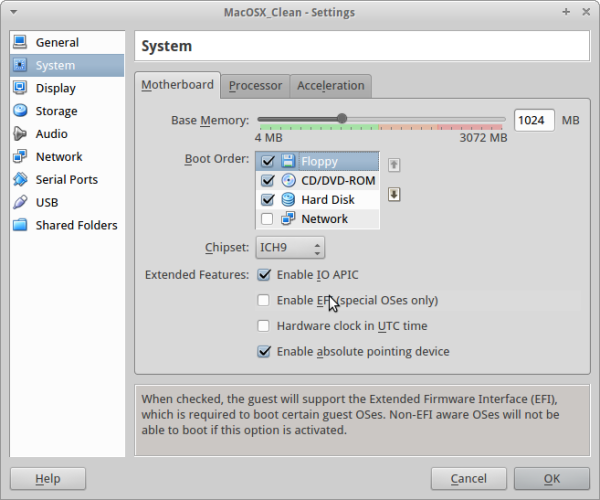
Open your VirtualBox installation and click on New. It will ask for a name and Operating System type. Name it as you want and select type "Mac OS X" and version "Mac OS X". You can use "Mac OS X (64 bits)" if you will want to boot the 64 bit kernel. Set a minimum of 1024 MB of RAM to it (or more if you have enough RAM on your computer) and a minimum of 20 GB of Hard Disk.
Then, in the virtual machine Settings, the only mandatory thing is to disable the "Enable EFI" option in the System entry. You can also set the video memory to 64MB and enable 3D acceleration.
2. Installation
The first time you start a new virtual machine, VirtualBox will ask you for a bootable media. Since neither the Snow Leopard ISO or DVD are able to boot without the EFI enabled, you will have to use iBoot. Mount iBoot in the virtual CD drive of the virtual machine. When iBoot boots up, unmount iBoot and mount the Snow Leopard DVD or ISO. Press F5 to refresh iBoot (Mac OS X Installer DVD will appear below the DVD icon) and press Enter to boot.

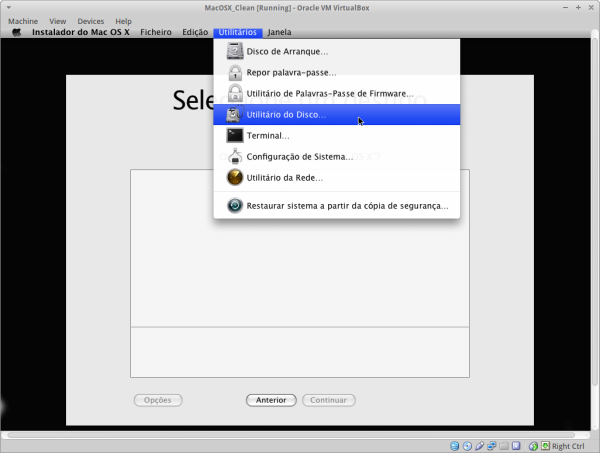
In the next screens you will have to select the System language and accept the conditions. Finally you will be asked to choose the Hard Disk where you want to install the OS. As you will soon find, the list is empty. However, in the top bar, you will find "Utils" menu which has a Disk Utility function. Select it, choose you VirtualBox hardisk, give it a name and erase it.
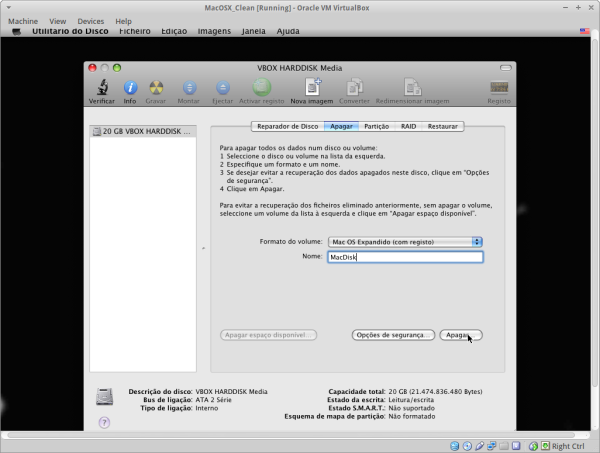
You will be back again in the screen where you chose the MacDisk for installation, and in the next screen, you will review the installation. Depending on the installation disks you are using, I suggest to "Personalize", and remove Printer suport, Additional fonts and Remove all translations (except English and/or your local language if not English).
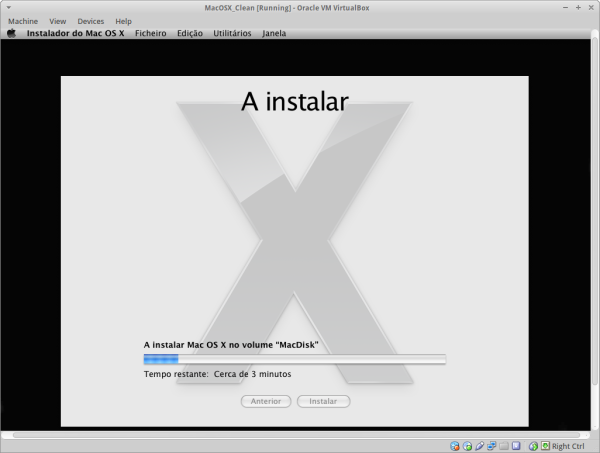
Hopefully the installation will succeed and you will be asked to Reboot. Chances are that the installer will not be able to reboot, so go to "Machine" and reboot it yourself. We will fix that later.
3. First use
After the first reboot, if you don't do nothing, you will notice that the virtual machine will not boot again because of the disabled EFI. You will have to use iBoot again. But this time, your disk with the installation will appear on the iBoot menu.

Select it using the arrow keys and press Enter to boot your new installation. If you are having troubles booting up or you did use a 32 bit virtual machine, before pressing Enter, write "arch=i386 -f -v" (without quotes). This will force (-f) the use of the 32 bit kernel and will make any errors visible, since we are using -v for verbose output.
It will take some time but eventually you will be taken to the register screen and then to the operating system user interface.
4. Do some cleaning
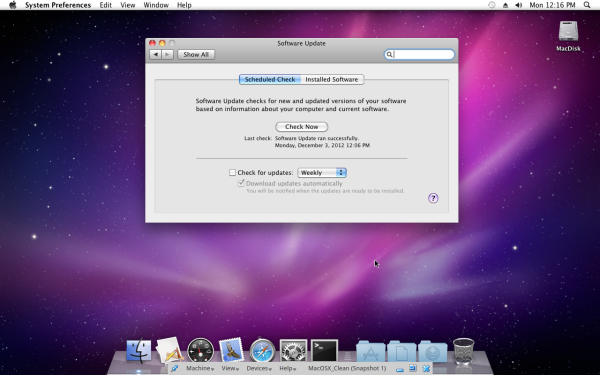
As typical in Hackintosh, some suggest to disable automatic update notifications. Since we will be able to correct the EFI problem, and the installation is pretty stock, maybe it is unnecessary. However, I recommend to switch off all update notifications. To do that, just click on the top-left Apple logo, go to System Preferences, and in Software Update, unselect "Check for Updates".
Also, there is an annoying feature in Mac OS X called Spotlight which allows a user to find files in the system very fast. However that comes with the cost of having a system service (mdworker) always checking for files and modifications on files, keeping the CPU and Hard Disk usage high. Go to a terminal (Applications -> Utils) and run "sudo mdutil -a -i off" (without quotes) to disable it. It will ask for your administrator password.
5. Upgrade to 10.6.8
If you have not already downloaded the 10.6.8 update Combo, you can use the Safari application to download it. But if you have already downloaded it you will have to copy the file to the virtual machine. Since Virtualbox does not handle .dmg files, and so you can’t mount the file like if it was a virtual CD, you will have to copy it. I have not found a better way than using an USB pen to copy all files from my Linux host to the Mac OS X guest. While you're at it, the Legacy kernel file too.
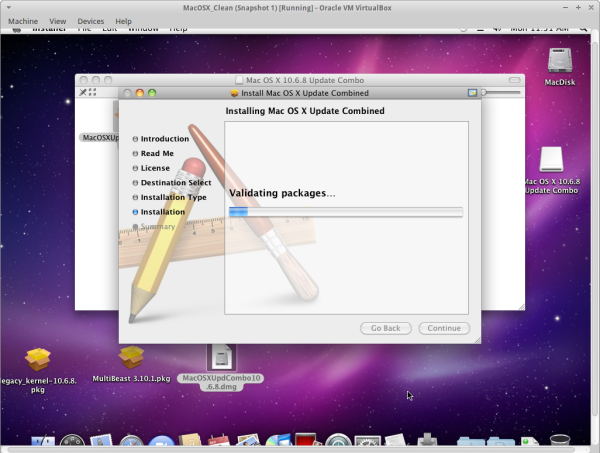
When you have the update combo file on the Mac OS X, just double click it to start the installer. Install the upgrade, it will take quite some time, and in the end, it will ask you to reboot the machine. Don't do it yet! Install the Legacy 10.6.8 Kernel too..
After installing the legacy kernel, you can try to reboot the system. Probably it will fail, just shut down the virtual machine window and exit VirtualBox.
6. Setup VirtualBox EFI
In my previous post about the installation of Mac OS X in VirtualBox, we had to install a boot loader because of the unsupported EFI. However, now we want to instruct VirtualBox to use the EFI to boot the system. In your host machine (remember that we have exited VirtualBox in the previous step), go to a terminal and execute the following:
VBoxManage modifyvm "XYZ" –firmware efi64
where "XYZ" is your virtual machine name (keep the quotes). This instructs VirtualBox to use a 64 bit EFI. If you are using a 32 bit virtual machine, and if “efi64″ does not work, try to use just “efi” without the 64. Then, execute the following:
VBoxManage setextradata "XYZ" VBoxInternal2/SmcDeviceKey
"ourhardworkbythesewordsguardedpleasedontsteal(c)AppleComputerInc"
Again "XYZ" is your virtual machine name. This line adds a DRM-like (Digital Rights Management) feature to the VirtualBox EFI. Basically, Snow Leopard needs that key in the original firmwares (in this case, simulated firmware) to be able to boot. Finally, execute:
VBoxManage setextradata "XYZ" VBoxInternal2/EfiGopMode 2
This sets the video resolution to 1024×768. You can change to any of the following numbers: 0 = 640×480, 1 = 800×600, 2 = 1024×768, 3 = 1280×1024, and 4 = 1440×900. I have not been able to set the resolution to others outside this list, but you should search a little bit more, and drop me a line of you find anything!
By the way, execute the previous instructions in the console is the same as opening your virtual machine .vbox file (XML) and add the following to
<ExtraDataItem name="VBoxInternal2/SmcDeviceKey" value="ourhardworkbythesewordsguardedpleasedontsteal(c)AppleComputerInc"/>

<ExtraDataItem name="VBoxInternal2/EfiGopMode" value="2"/>
and the following to the
<Firmware type="EFI64"/>
You're done.
7. Boot
Now you can boot without iBoot, and you will be able to reboot and shutdown from the virtual machine. I find this way of doing things much more stable the the other. Yes, you lose the capability of setting wide resolutions, but you gain stability, and the certain that your Mac OS X starts each time you press the "Start" button of your VirtualBox installation
8. 32-bit or 64-bit kernel
It kind of depends on your need, but if you need to boot a different kernel architecture, on Mac OS X, find the file "/Library/Preferences/SystemConfiguration/com.apple.Boot.plist". Search for the "Kernel Flags" key and set (without quotes) "arch=i386" for the 32-bit architecture or "arch=x86_64" for the 64 bits architecture. Reboot, and next time you boot, you will have a different kernel architecture. Just guarantee that you use 64 bit if you set up a 64 bit virtual machine in the first place.
(You can check by going to Applications->Utils->System Configuration and check in "Software" if "Kernel and 64 bit extensions" has a yes or no after it).
8. Miscellaneous
- It seems the only problem with this method is just the "fixed" screen resolutions available.
9. Sources
- http://jdrrant.blogspot.pt/2012/05/snow-leopard-1068-on-virtualbox-4-with.html (general method)
- http://www.projectosx.com/forum/index.php?showtopic=1320
- http://sunblog.mbrannigan.com/2007/07/clearing-spotlight-cache-in-mac-osx.html (clearing the spotlight service)
Take care!